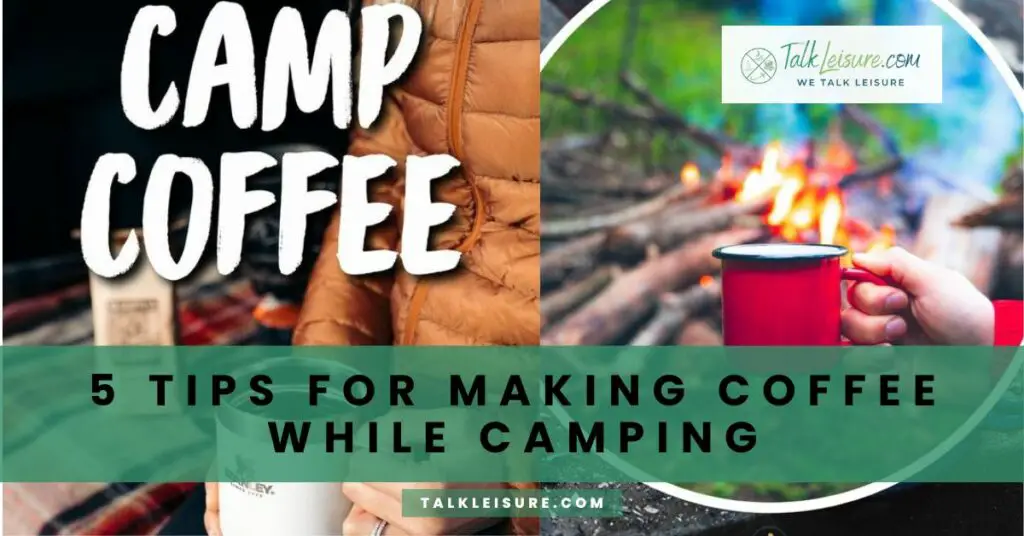
Imagine the early morning sun casting a golden glow over the campsite as you sit, enveloped in the soothing sounds of nature, sipping a steaming cup of coffee.
The ritual of brewing coffee while camping is a cherished experience, but it comes with its challenges.
In this guide, we’ll explore the art of making the perfect cup in the wild.
What is the easiest way to make coffee while camping?
The Camp Coffee Problem
Brewing coffee in the wilderness presents unique challenges.
Limited resources, lack of electricity, and the need for a compact setup are obstacles every camper faces.
Acknowledging these challenges sets the stage for overcoming them.
Coffee-Making Essentials
To overcome these challenges, having the right tools and equipment is crucial.
Explore the essential items that make up a compact and efficient camping coffee kit, ensuring you are well-prepared for your coffee-brewing adventure.
7 Best Practices for a Sustainable Coffee Routine
1. Instant Coffee Bags
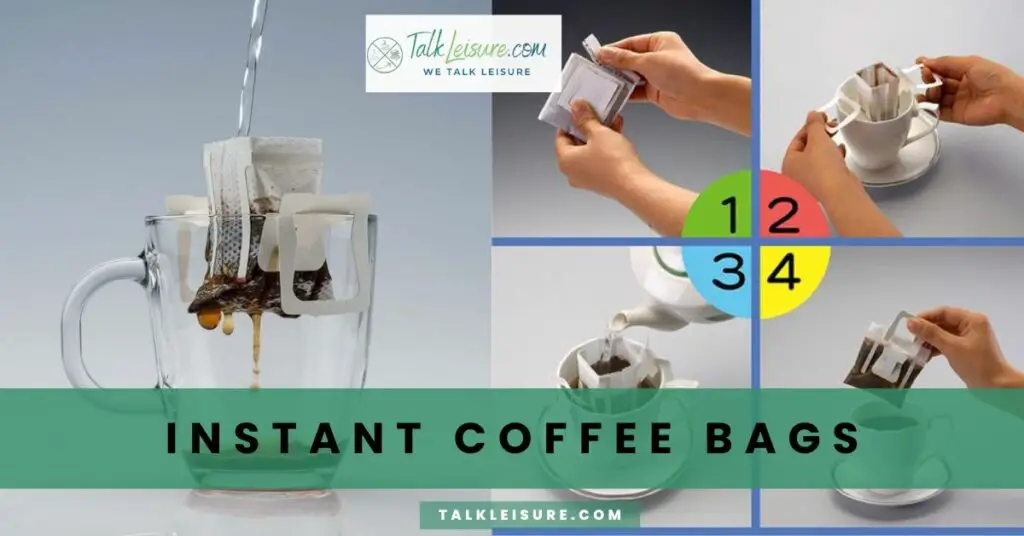
When you’re out in the wilderness, convenience often takes precedence.
Instant coffee bags provide a hassle-free solution for campers who want a quick and satisfying cup without the fuss.
Let’s explore the ins and outs of this popular camping coffee method.
Supplies Needed
- Instant coffee bags (readily available at most stores or pre-packaged)
- Hot water (can be heated using a portable camping stove or over an open flame)
- Your favorite mug
- Optional: Sweeteners, creamers, or flavorings to suit your taste
How to Make Instant Coffee Bags While Camping
- Boil Water: Begin by heating water to near-boiling. This can be achieved using a portable camping stove or by placing a kettle over an open flame.
- Place the Bag: Dip the instant coffee bag into your mug, ensuring that the tag is hanging over the rim for easy removal later.
- Pour Hot Water: Once the water is hot, carefully pour it over the coffee bag, ensuring it is fully submerged. Let it steep for the recommended time (usually a few minutes).
- Adjust to Taste: Customize your coffee by adding sweeteners, creamers, or any other flavorings you prefer. Stir well with a camping spoon.
- Remove and Enjoy: After steeping, carefully lift the coffee bag out of the mug, using the tag. Give it a gentle squeeze against the side of the mug to extract any remaining flavor.
- Dispose Responsibly: As a responsible camper, remember to pack out used coffee bags, leaving no trace behind.
2. The Beloved Cowboy Method

Step into the timeless world of campfire tales and cowboy lore with the Beloved cowboy coffee method.
This iconic brewing technique brings a touch of tradition to your camping experience, allowing you to savor the bold flavors of coffee brewed over an open flame.
Let’s dive into the details of this classic approach.
Supplies Needed
- Coarsely ground coffee beans (about 2 tablespoons per 8 ounces of water)
- Water
- Campfire or portable stove
- Heat-resistant coffee pot or kettle
- Mug or enamel cup
- Optional: Cold water to help settle grounds
How to Make Cowboy Coffee While Camping
- Measure Coffee: Begin by measuring your coarsely ground coffee. The general rule is about 2 tablespoons of coffee per 8 ounces of water, but you can adjust to your preferred strength.
- Add Water to Pot: Fill your heat-resistant coffee pot or kettle with the desired amount of water. Place it over the campfire or portable stove and bring it to a rolling boil.
- Remove from Heat: Once the water reaches a boil, take it off the heat source and let it settle for a moment.
- Add Coffee Grounds: Add the measured coffee grounds directly to the hot water. Stir the mixture well to ensure even saturation.
- Let it Steep: Allow the coffee to steep for a few minutes. The steeping time can vary based on personal preference, but around four minutes is a good starting point.
- Settle the Grounds: To settle the grounds, you can either sprinkle a bit of cold water on the surface or gently tap the side of the pot. This helps the grounds sink to the bottom.
- Serve and Enjoy: Pour the coffee slowly into your mug, leaving the settled grounds behind. Enjoy the robust flavors of cowboy coffee by the campfire.
3. Scoop Top Method
For campers seeking a bit of creativity in their coffee ritual, the Scoop Top Method offers a unique twist.
This method combines simplicity with a touch of customization, allowing you to tailor your camping coffee experience.
Let’s explore the details of this inventive approach.
Supplies Needed
- Coarse coffee grounds (2 tablespoons per 8 ounces of water)
- Water
- Heat-resistant camping mug or pot
- Sturdy stirring stick or spoon
- Optional: Sweeteners, creamers, or flavorings
How to Make Coffee Using the Scoop Top Method
- Measure Coffee: Begin by measuring your coarsely ground coffee. A standard ratio is about 2 tablespoons of coffee per 8 ounces of water, but you can adjust based on your taste preferences.
- Boil Water: Heat the desired amount of water using your camping stove or over an open flame until it reaches a rolling boil.
- Add Coffee Grounds: Once the water is boiling, remove it from the heat source and add the measured coffee grounds directly into the hot water.
- Stir Well: Use a sturdy stirring stick or spoon to thoroughly mix the coffee grounds with the hot water. Ensure even saturation for a well-balanced brew.
- Let it Steep: Allow the coffee to steep for a few minutes. The steeping time can be adjusted based on your desired strength, typically ranging from 3 to 5 minutes.
- Scoop from the Top: This is where the creative twist comes in. Instead of pouring the coffee directly, use a scoop or ladle to scoop the brewed coffee from the top, avoiding the grounds settled at the bottom.
- Serve and Customize: Pour the scooped coffee into your camping mug, leaving the settled grounds behind. Customize your coffee with sweeteners, creamers, or any additional flavorings you prefer.
- Enjoy the Crafted Brew: Savor the unique flavors of your Scoop Top coffee creation while basking in the beauty of your camping surroundings.
4. Percolator Camping Coffee
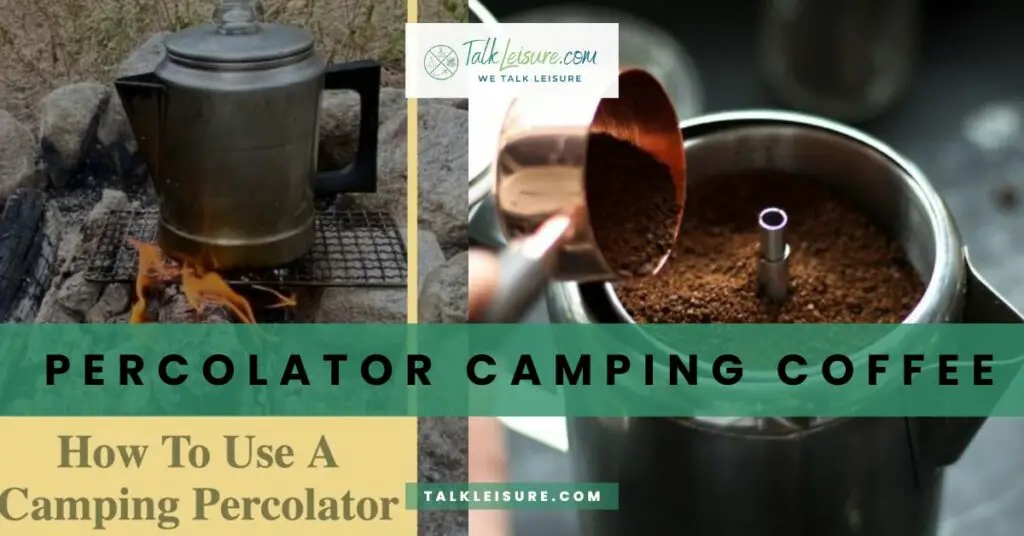
Step into the nostalgia of camping with a percolator, the classic coffee maker that has stood the test of time.
Percolator camping coffee offers a familiar and comforting brewing method, providing campers with a taste of tradition under the open sky.
Let’s delve into the steps of crafting the perfect cup with this iconic apparatus.
Supplies Needed
- Coarse coffee grounds (1 to 2 tablespoons per 6 ounces of water)
- Water
- Percolator coffee pot
- Heat source (campfire, camping stove, or portable burner)
- Mug or camping cup
- Optional: Sweeteners, creamers, or flavorings
How to Make Percolator Camping Coffee
- Prepare the Percolator: Assemble your percolator, ensuring all parts are clean and in good condition. Fill the bottom chamber with water, making sure not to exceed the fill line.
- Add Coffee Grounds: Place the desired amount of coarsely ground coffee into the percolator basket. A common ratio is 1 to 2 tablespoons of coffee per 6 ounces of water, but you can adjust based on your taste preferences.
- Assemble and Place on Heat Source: Put the percolator together, making sure the stem is properly inserted into the coffee grounds. Place the percolator on your chosen heat source, whether it’s a campfire, camping stove, or portable burner.
- Monitor Percolation: As the water heats, it will start to percolate up through the stem and over the coffee grounds. Keep an eye on the percolation process, aiming for a gentle and consistent brewing action.
- Determine Brew Strength: The longer the percolation, the stronger the coffee will be. Adjust the brewing time to achieve your preferred strength. Generally, 5-10 minutes is a suitable range.
- Serve and Customize: Once the brewing is complete, remove the percolator from the heat source. Pour the brewed coffee into your camping mug. Customize your cup with sweeteners, creamers, or any additional flavorings.
- Enjoy the Classic Brew: Savor the rich and robust flavors of percolator coffee, reminiscent of camping trips from days gone by.
5. Espresso Pot Camping Coffee
For those campers who appreciate the bold and intense flavors of espresso, the Espresso Pot Camping Coffee method is a game-changer.
This compact and portable brewing technique brings the sophistication of espresso to the great outdoors.
Let’s dive into the steps of crafting a rich and robust cup of espresso-inspired coffee at your campsite.
Supplies Needed
- Coarse coffee grounds suitable for espresso (about 1 to 2 tablespoons per shot)
- Water
- Espresso pot (Moka pot)
- Portable stove or heat source
- Espresso cup or small camping mug
- Optional: Sweeteners or milk for customization
How to Make Espresso Pot Camping Coffee
- Prepare Coffee Grounds: Choose a high-quality, coarse coffee suitable for espresso. Measure about 1 to 2 tablespoons of coffee grounds per shot, adjusting for your preferred strength.
- Fill Water Reservoir: Fill the bottom chamber of the espresso pot with water up to the safety valve. Ensure not to surpass the safety valve to prevent any safety issues during brewing.
- Add Coffee Grounds: Place the measured coffee grounds into the filter basket of the espresso pot. Distribute them evenly and level off the excess.
- Assemble and Place on Heat Source: Assemble the espresso pot, ensuring a tight seal. Place it on a portable stove or your chosen heat source for brewing.
- Brew Espresso: Heat the espresso pot over medium heat. The water in the bottom chamber will be forced through the coffee grounds, resulting in a concentrated and robust brew. Listen for the characteristic hissing sound, indicating that the brewing process is complete.
- Serve and Customize: Pour the freshly brewed espresso into your espresso cup or small camping mug. Customize your cup with sweeteners or milk to suit your taste.
- Savor the Intensity: Take a moment to savor the intense and full-bodied flavors of your espresso-inspired camping coffee. Despite being in the wilderness, you can now enjoy the sophistication of a coffee shop-worthy brew.
Conclusion
In the heart of the wilderness, where the aroma of nature intertwines with the enticing scent of brewing coffee, these five methods redefine the art of campsite coffee-making.
From the simplicity of Instant Coffee Bags to the iconic Cowboy Method, the creative Scoop Top approach, the classic Percolator brewing, and the intense indulgence of Espresso Pot Coffee, each method adds its unique flavor to the camping experience.
Embrace the versatility of these techniques, whether you prefer a quick and convenient cup or crave the rich intensity of espresso-inspired coffee.
As you embark on your outdoor adventures, let the ritual of campsite coffee-making become a cherished tradition, blending the simplicity of nature with the bold and robust flavors of a perfectly crafted cup.
Cheers to the joy of brewing in the great outdoors!
Happy brewing, campers!
Frequently Asked Questions
Can I use regular coffee grounds for camping coffee?
While regular coffee grounds work, it’s recommended to use coarse grounds for camping methods to avoid clogging filters or impacting the taste. Adjust the grind based on your chosen brewing method.
How can I ensure my coffee stays hot while camping?
Invest in a quality insulated travel mug to keep your coffee hot for an extended period. Alternatively, consider using a thermos or a double-walled camping mug.
Are there any specific safety considerations for brewing coffee while camping?
Always follow safety guidelines for your chosen brewing method. Be cautious with open flames, hot surfaces, and ensure proper ventilation when using stoves. Additionally, practice Leave No Trace principles by properly disposing of coffee grounds.
What is the quickest method for making coffee while camping?
Instant Coffee Bags or the Scoop Top Method are among the quickest options. Simply boil water and enjoy a speedy cup of coffee without the need for extensive brewing.
How can I clean coffee-making equipment while camping?
Use environmentally friendly soap or wipes to clean your equipment. For methods like the percolator or espresso pot, disassemble and clean each part thoroughly. Dispose of coffee grounds responsibly.
Can I bring my electric coffee maker camping?
While it’s possible with access to a power source, traditional camping methods are more practical. Consider portable options like the Aeropress or a camping-friendly percolator for a more authentic outdoor experience.
What’s the best method for minimal cleanup while camping?
Instant Coffee Bags or the Scoop Top Method typically require minimal cleanup. Use biodegradable wipes for equipment and dispose of coffee grounds away from water sources following Leave No Trace principles.
Best Wishes!