Imagine the smell of freshly baked waffle cones wafting through your kitchen as you eagerly await the first bite of your homemade creation.
Waffle cones are a sweet and crunchy treat that pairs perfectly with any ice cream flavor, making them a staple in many households.
But have you ever wondered how to make these delectable cones at home? Look no further because we’ve got the perfect recipe for you.
Mix flour, sugar, salt. Whisk eggs, milk, butter, vanilla. Combine and make the batter. Heat the waffle cone maker, cook the batter, and roll it into a cone. Cool, fill, and enjoy!
However, Making waffle cones may seem daunting, but with the right ingredients and equipment, it’s easier!
In this article, we’ll guide you through every process step – from preheating your waffle cone maker to shaping and storing your finished product.
You’ll learn to mix the batter so every cone is crispy and golden brown. Plus, we’ll provide tips for customizing your waffle cones with different flavors and toppings to make them truly unique.
So grab a pen and paper (or your phone) – it’s time to start jotting down this delicious recipe!
Mix 1 cup of flour, 1/2 cup of sugar, 1/4 teaspoon of salt, two beaten eggs, 1/4 cup of melted butter, and 1/2 teaspoon of vanilla extract. Heat your waffle cone maker and grease it lightly.
Pour a spoonful of batter onto the iron, close it, and cook for 1-2 minutes until golden.
Quickly shape the waffle into a cone using a cone roller or around a cylindrical object.
Not only the waffle cones but waffle bowls are also popular. It’s also easy to make, and you only need a tablespoon of batter. Also, this is the best way to enjoy ice cream for those who don’t like the cone form.
Allow it to cool and set before enjoying your crispy, homemade waffle cone with your favorite ice cream flavors and toppings.
Gather Your Ingredients And Equipment
Gather Your Ingredients And Equipment
You’ll love how easy it is to gather everything you need to create the perfect crispy, sweet vessels for your favorite frozen treats.
Start by gathering your ingredients:
1 cup of flour,
1/4 teaspoon salt,
2/3 cup sugar,
Two eggs,
Two tablespoons melted butter
One teaspoon of vanilla extract.
Make sure you measure everything accurately to ensure the best results.
Once your ingredients are ready, it’s time to take out your equipment.
You’ll need a mixing bowl and whisk or stand mixer to combine your ingredients.
Mixing techniques are important when making waffle cones, so be sure not to overmix the batter.
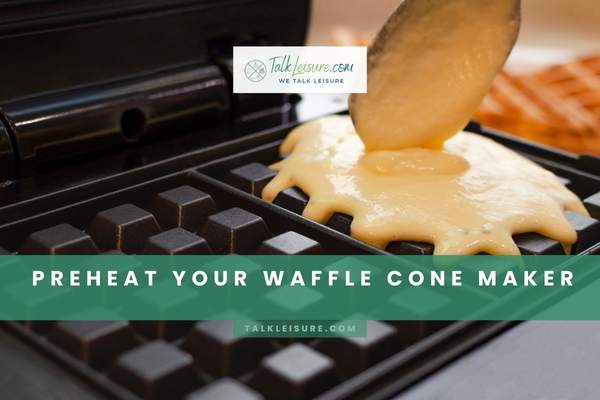
When everything is mixed well, preheat your waffle cone maker and start making those delicious cones!
The preheating time and temperature may vary depending on the brand of your waffle cone maker.
It’s essential to follow the manufacturer’s instructions for preheating to ensure that your cones will come out crispy and golden.
Generally, most waffle cone makers require a preheating time of 5-10 minutes at a temperature range between 350°F – 400°F.
Once your waffle maker has reached the desired temperature, it’s ready for action!
Remember to use caution when handling the hot machine.
Use oven mitts or pot holders when opening and closing the lid or removing the cones from the griddle.
Now that your waffle cone maker is ready mix up some batter!
Mix the Batter
Mix the Batter
Now it’s time to mix the batter for your waffle cones!
To make the perfect batter, you’ll need to follow a recipe and pay attention to tips for mixing.
Consistency is also key – you want a smooth, pourable batter that will create evenly cooked cones.
Here’s how to get started with making your ideal waffle cone batter.
Recipe For Waffle Cone Batter
Mix the ingredients until they become a smooth, pourable batter that will make your taste buds dance with delight.
For the perfect waffle cone batter, you’ll need flour, sugar, salt, eggs, milk, and butter.
Add some vanilla extract or almond essence to the mix for an extra flavor punch.
Combine all these ingredients in a mixing bowl and whisk until no lumps are left.
When mixing the batter for your waffle cones, it’s important to use proper mixing techniques to ensure that everything is well combined.
You can use a handheld whisk or an electric mixer for faster results.
Once your batter is mixed to perfection, it should be thick enough to coat the back of a spoon without dripping off too easily.
This consistency will give you perfectly shaped cones every time!
Now that you’ve got your batter ready let’s move on to some tips for mixing and consistency to get those professional-looking cones!
Tips For Mixing And Consistency
Let’s explore some handy tips to ensure your batter is perfectly smooth and the consistency is just right for creating mouth-watering, professional-looking treats.
First off, it’s important to mix the ingredients thoroughly.
Use a whisk or electric mixer to blend everything until there are no lumps or clumps in the batter.
This will make pouring onto the waffle cone maker easier and create a uniform shape.
Next, consider making adjustments to the batter as needed.
If it seems too thick or difficult to pour, add a small amount of milk or water until you achieve the desired consistency. On the other hand, if the batter is too runny and doesn’t hold its shape well on the waffle cone maker, try adding a bit more flour until it thickens up slightly.
Don’t be afraid to experiment with different mixing techniques and adjustments until you find what works best for you and your recipe!
Now that your batter is ready let’s cook those delicious waffle cones!
Cook The Waffle Cones- Make Homemade Waffle Cones
Cook The Waffle Cones
You’re about to create a crispy and delicious treat that will make your taste buds dance with joy.
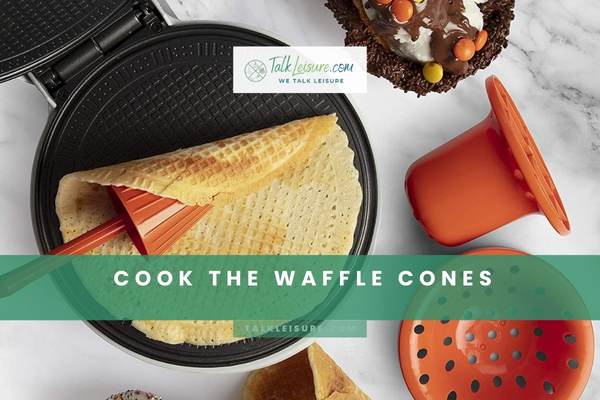
Now that you’ve mixed the batter, it’s time to cook the waffle cones.
To do this, preheat your waffle cone maker according to its instructions.
Once heated, lightly coat both sides of the maker with cooking spray. Next, pour a small amount of batter onto the center of the lower plate and close the lid tightly. Cook for around 30 seconds or until golden brown.
Using tongs or a fork, carefully remove the waffle from the plate and immediately roll it into a cone shape using a cone roller or by hand if you don’t have one.
Repeat this process until all of your batter is used up.
Now that you’ve cooked your waffle cones to perfection, it’s time to move on to shaping them!
Shape Waffle Cones
It’s important to have a cone roller to shape your delicious treats, or you can use your hands if you don’t have one.
Cone shaping techniques vary depending on personal preference and the texture of the cone desired. Rolling the warm waffle around the cone-shaped tool or forming it around a cylindrical object like a rolling pin can create the classic pointed shape. Alternatively, you can mold them by hand into unique shapes like bowls or cups.
When shaping your cones, remember that they will harden as they cool, so be sure to form them quickly while they’re still pliable. If you prefer a softer texture, roll them thinner and shape with gentle pressure. For a crispier texture, make them thicker and press firmly when shaping.
Once shaped to perfection, let them cool completely before filling them with ice cream or other sweet treats.
Impress your guests with perfectly shaped homemade waffle cones that add elegance to any dessert display.
Now that your cones are ready for filling let’s move on to storing them until serving time.
Store Homemade Waffle Cones
Store The Cones
After shaping your homemade waffle cones, storing them properly is important to maintain their shape and texture. Here are some
storing tips and preservation methods that will help keep your cones fresh:
Store the cones in an airtight container: This will prevent moisture from seeping into them and making them soggy. You can use a plastic bag or a Tupperware container with a lid.
Place a layer of parchment paper between each cone: This will prevent the cones from sticking together or getting crushed. It also makes grabbing one cone at a time easier without disturbing the others.
Another way to preserve your waffle cones is by adding a layer of chocolate.
The chocolate is a barrier, preventing ice cream from making the cone soggy.
Melt some chocolate chips in the microwave or over low heat on the stovetop, dip the tip of each cone in it, and let it harden before filling with ice cream.
Now that you know how to store your freshly made waffle cones, it’s time to serve and enjoy!
Serve And Enjoy With The Best Homemade Ice Cream Recipes
Serve And Enjoy
Now that you’ve got your freshly baked waffle cones, it’s time to pair them with your favorite ice cream and start enjoying!
Here are some tips for serving and presentation to make the most of your cone experience.
First, choose a high-quality ice cream that complements the flavor of your waffle cone.
Next, scoop the ice cream into the cone using a small spatula or spoon to create a neat and attractive presentation.
Finally, add toppings like sprinkles or chocolate chips to enhance your delicious treat’s taste and appearance.
Pairing Your Cones With Ice Cream
When enjoying your frozen treat, you’ll want to find the perfect accompaniment to enhance your experience and take it to the next level. Pairing your homemade waffle cones with the right ice cream flavor can make all the difference. Here are some ideas to inspire you:
Classic Vanilla: The smooth and creamy vanilla ice cream complements the crunchiness of the waffle cone perfectly.
Chocolate Lovers: If you’re a fan of chocolate, try pairing your cone with chocolate chip or fudge brownie ice cream for a decadent treat.
Fruity Flavors: Pair your cones with fruity sorbets like raspberry or mango for a refreshing option.
Toppings and Garnishes: Add some extra pizzazz by topping off your cone with sprinkles, whipped cream, chocolate sauce, or fresh fruit.
Presentation Ideas: Serve up your cones in a colorful bowl or on a decorative plate for an Instagram-worthy presentation.
When serving up these delicious treats, remember some presentation and serving tips that will elevate your dessert game even further.
Tips For Serving And Presentation
You can take your homemade ice cream cones to the next level by following these tips for serving and presentation.
First, consider using unique serving ideas such as placing the cone in a small dish with fresh fruit or adding a whipped cream dollop.
You can also drizzle chocolate sauce over the cone or sprinkle it with toasted nuts for added texture and flavor.
Another fun idea is to serve mini cones as a party snack or dessert, perfect for sharing.
Regarding presentation techniques, make sure your cones look visually appealing.
Use colorful sprinkles or candy pieces to decorate the outside of the cone before filling it with ice cream.
If you’re feeling creative, make customized cones by dipping them in different colored chocolates or adding food coloring to the waffle batter mixture before cooking.
With these tips, you’ll be able to impress your guests with both taste and aesthetic appeal.
It is now we are moving on to variations and customizations.
Variations And Customizations
Variations And Customizations
Get creative with your cone-making and add your personal touch for a unique and flavorful treat. Experiment with different flavor combinations to make your waffle cones stand out.
Here are some ideas to get you started:
Chocolate Dipped: Melt chocolate chips in a bowl and dip the top of the cone into the chocolate, then add sprinkles or chopped nuts.
Fruity: Add freeze-dried fruit powder to the batter for a pop of color and flavor.
Spiced: Mix cinnamon or pumpkin spice into the batter for a warm, cozy taste.
Holiday Flavors: Make cones for special occasions by adding peppermint extract or red and green food coloring for Christmas or orange juice and zest for Halloween.
Customizing your waffle cones is an easy way to make them more exciting and memorable. Don’t be afraid to try new things!
Encouragement To Try Making Your Waffle Cones
Making homemade ice cream cones is a fun and rewarding experience that you should try at least once.
Not only will you impress your friends and family with your culinary skills, but you’ll also be satisfied knowing that every cone was made with love and care.
The benefits of making your waffle cones are numerous.
You can customize them to fit any dietary restrictions or preferences. Gluten-free? No problem! Vegan? You got it! Plus, you can experiment with different flavors like chocolate or cinnamon for an extra kick.
You can filled it with your favorite ice. Also, if you need a waffle cone or need to shape the cone, you have options.
Don’t be intimidated by the process – follow the tips from our previous subtopic, and soon enough, you’ll be a pro at making waffle cones in no time!
How To Make Waffle Bowl – Best Waffle Bowl To Enjoy Your Favorite Ice Cream
To make a waffle bowl, preheat your electric waffle cone maker.
Prepare your chocolate waffle batter according to the recipe, which makes approximately four waffle bowls.
Pour the batter onto the cone mold of the waffle cone maker and close it.
Cook for a few minutes until the batter is golden brown. Carefully remove the cooked waffle from the mold and gently shape it into a bowl while still warm.
To prevent leaks, consider adding a thin layer of melted chocolate or a scoop of ice cream to the bottom of the cone to hold the contents.
This recipe makes it easy to prepare.
Also, these butter-crisp waffles help you to enjoy the treat. Enjoy your homemade waffle bowl Filled with your favorite ice cream or sweet treats!
Summary Of Recipe And Tips
Take note of the helpful hints and tricks in this section to ensure your homemade ice cream cones turn out perfectly every time. Here are some tips to keep in mind:
Use a waffle cone maker: This will help you achieve the perfect shape and texture for your cones.
Add cornstarch to the batter: This will make your cones crisper and less likely to become soggy when filled with ice cream.
Roll the cones tightly as tightly as possible while they’re still hot to prevent them from unraveling.
Store in an airtight container: Keep your finished cones fresh by storing them in an airtight container until ready to use.
Making your own waffle cones is fun and allows you to experiment with different recipe alternatives and flavor options.
Add cocoa powder or cinnamon for a unique twist on traditional waffle cones, or even fill them with sprinkles or chopped nuts for added crunch.
With these tips, you can create delicious homemade waffle cones that impress you.
So go ahead and give it a try – we promise it’s worth it!
Final Thoughts
So you’ve learned about the variations and customizations of making waffle cones, but now it’s time for the conclusion and final thoughts.
To summarize the recipe and tips, making waffle cones is a simple process that involves mixing ingredients, cooking on a waffle iron, and shaping while still warm.
Some tips include using high-quality ingredients and letting the batter rest before cooking.
Don’t be afraid to make your waffle cones at home – it’s a fun and delicious way to impress your friends and family!
Frequently Asked Questions
How Long Do Waffle Cones Typically Last Before Going Stale?
Waffle cones usually stay fresh for about 1 to 2 weeks if stored in an airtight container in a cool, dry place. However, they might become stale after that, which could affect their taste and texture.
Can The Batter Be Made Ahead Of Time And Stored In The Fridge?
Yes, you can make waffle cone batter ahead of time and store it in the fridge.
Prepare the batter according to the recipe, then cover it tightly and refrigerate.
When ready to use, let it come to room temperature and give it a quick stir before cooking.
This can save time and still result in delicious waffle cones.
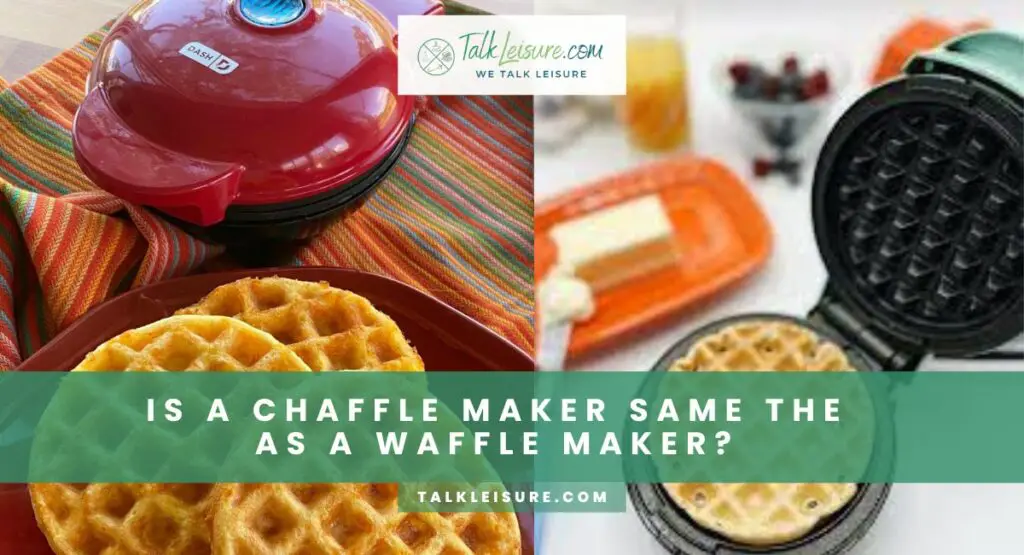
Can A Waffle Cone Maker Be Used To Make Other Types Of Desserts?
Simply pour cookie or tortilla batter onto the heated plates, close the maker, and cook until golden brown.
This lets you create a variety of treats beyond waffle cones. Just adjust cooking times and ingredients as needed for different results.
Is It Possible To Make Waffle Cones Without A Waffle Cone Maker?
Yes, you can make waffle cones without a waffle cone maker.
Use a rolling pin to flatten the waffle batter and then shape it into cones by wrapping it around a cylinder-like object (like thick paper or aluminum foil).
Bake them in the oven until golden and firm. Once they cool, homemade waffle cones are ready for ice cream!
Can A Gluten-Free Or Vegan Version Of This Recipe Be Made?
You can make a gluten-free version of this recipe using gluten-free flour instead of regular flour.
For a vegan version, replace dairy ingredients like milk and butter with plant-based alternatives like almond milk and coconut oil.
Remember that these modifications may affect the final product’s texture and flavor profile, so it may take some experimentation to find your perfect recipe.
How To Make Waffle Cones With Pancake Mix? -… Are you tired of buying pre-made waffle cones that are bland and lackluster? Did you know you can easily make homemade waffle cones with pancake…
How To Make Waffle Cones Without A Waffle Iron? Did you know that the average American consumes approximately 23 pounds of ice cream annually? And while store-bought waffle cones may be convenient, making your…