Are you tired of buying pre-made waffle cones that are bland and lackluster?
Did you know you can easily make homemade waffle cones with pancake mix?
To make waffle cones with pancake mix, mix pancake batter as directed. Preheat the waffle cone maker, pour batter, and cook until golden brown. Roll into a cone shape while still warm. Enjoy!
In fact, according to a recent survey, 68% of people prefer homemade waffle cones over store-bought ones.
Making your waffle cones ensures they are fresh and delicious and allows customization to fit your taste preferences.
Plus, it’s a fun activity to do with family or friends.
With just a few simple steps, you can whip up a batch of crispy waffle cones that will take your ice cream game to the next level.
So gather your ingredients, and let’s start making mouth-watering waffle cones!
Gather Your Ingredients To Make Homemade Waffle Cones
Gather Your Ingredients
You must gather all the necessary ingredients before creating your delicious treat.
Firstly, you’ll need pancake mix, the base ingredient for making waffle cones. Also, a cone roller is a must to make buttercrisp waffle by twisting around the cone.
You can use any brand of pancake mix that you prefer or have on hand.
However, it’s important to note that different brands may yield slightly different results in terms of texture and flavor.
Ingredient variations are also possible to customize your waffle cones further.
For example, you could add chocolate chips or cocoa powder to your pancake mix batter to make chocolate waffle cones.
Egg whites will make your waffle cone texture crispy. So, whisk the ingredients properly.
Alternatively, add vanilla extract or cinnamon to create a unique flavor profile.
If you don’t have a waffle cone maker at home, don’t worry – there are alternatives!
You could use a regular waffle maker or even hand-shape the batter into cones and bake them in the oven until golden brown.
With all the ingredients ready and some creative choices made, it’s time to move on to mixing everything.
Mix Your Ingredients
Mix Your Ingredients
It’s amazing how many ways you can use a simple box of pancake mix to create delicious treats.
Making waffle cones is no exception!
Gather your pancake mix, milk, melted butter, and vanilla extract.
Once you have all your ingredients ready, it’s time to mix them.
To properly mix the batter for your waffle cones, follow these mixing techniques for a cup of batter:
Mix the dry ingredients first before adding any liquids.
Slowly pour the liquid ingredients while stirring continuously until a smooth batter forms.
Let the batter rest for at least 5 minutes before making waffle cones.
If you encounter any issues with your batter, such as lumps or thin consistency, don’t fret! Here are some troubleshooting tips:
For the lumpy batter, try sifting the dry ingredients before mixing.
If your batter is too thin or runny, add more pancake mix until the desired consistency is achieved.
On the flip side, if your batter is too thick and difficult to spread evenly on the waffle cone maker surface, add more milk or water gradually until it becomes easier to work with.
Now that you’ve successfully mixed your waffle cone batter without hiccups, it’s time to heat your waffle cone maker and start cooking those yummy cones!
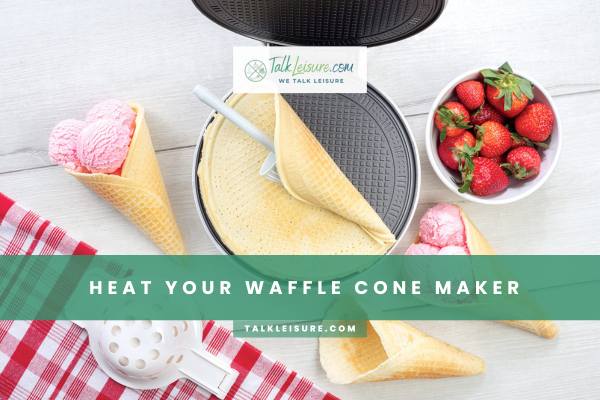
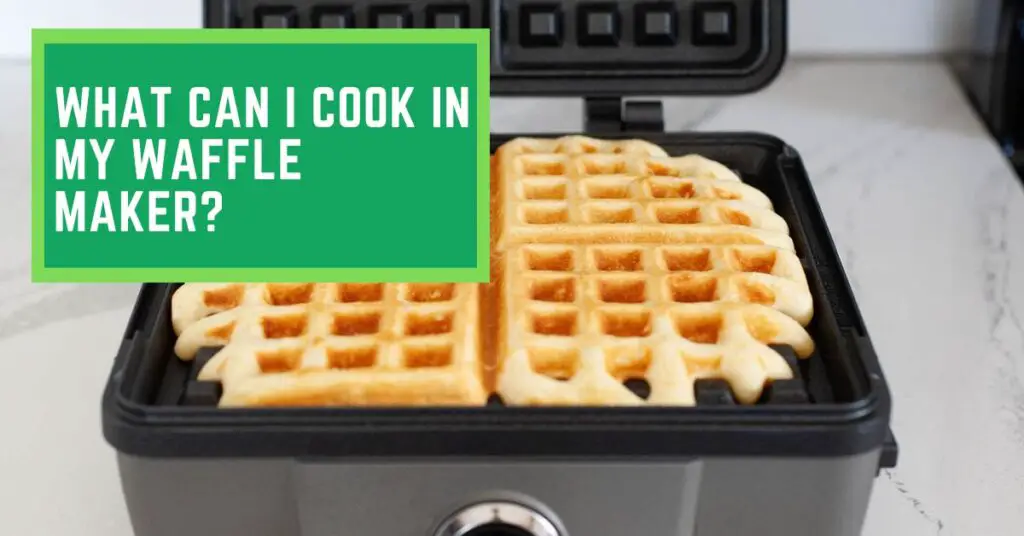
Heat Your Waffle Cone Maker
Heat Your Waffle Cone Maker
Let’s prepare to cook up some crispy, golden-brown treats by heating your specialized appliance designed to create those beloved, crunchy pastries.
Before plugging in your waffle cone maker, it’s important to understand how to maintain the device for long-lasting use.
Clean the machine after each use with a damp cloth and avoid using abrasive cleaners that can scratch the surface or remove the non-stick coating.
Additionally, store your waffle cone maker in a dry location to prevent rust from forming on any metal parts.
Once your waffle cone maker is properly maintained, it’s time to heat it and experiment with different batter flavors! Preheat the appliance according to its instructions before pouring your pancake mix batter.
Add cocoa powder, cinnamon or vanilla extract to create unique flavors that tickle your taste buds.
Be mindful of their consistency when experimenting with different batters, as thicker batters may require additional cooking time.
With these tips, you can now shape your waffle cones into perfect cylinders!Also easy to remove them from the waffle maker.
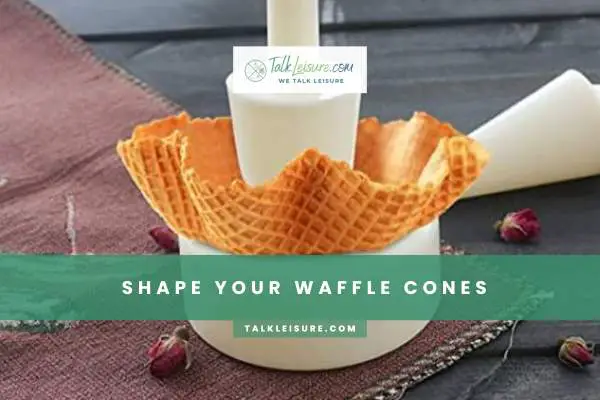
Shape Your Waffle Cones – You Need A Waffle Cone Maker To Shape Waffle
Shape Your Waffle Cones
Now that your waffle cone maker is heated, it’s time to shape your cones!
Start by spooning the pancake mix batter onto the waffle cone maker. Use just enough batter to cover the bottom of the mold.
Then, quickly roll the hot and pliable batter into a cone shape before it cools down. Don’t worry if your first few attempts aren’t perfect – practice makes perfect!
Spooning Batter onto the Waffle Cone Maker
Scoopin’ the batter onto the iron is a crucial step in achieving the perfect texture, with too little batter resulting in a thin and crispy cone, while too much will create a thick and doughy one.
To spoon the batter onto the waffle cone maker, use a small ladle or spoon to place about two tablespoons of the pancake mix onto the center of each section.
Be careful not to overfill as this will cause it to overflow and stick to the iron.
If you’re having trouble getting your cones to cook evenly, try alternative methods, such as adding more oil or butter to grease your waffle cone maker.
This can help ensure that each section of your iron heats up correctly and prevents unwanted sticking.
Once you’ve scooped all your batter onto the iron, close it shut and wait for around 2-3 minutes until it turns golden brown.
Then, remove it from heat and carefully roll it into a cone shape using a rolling pin or similar tool before letting it cool down completely.
Now you’re ready to fill!
Rolling The Batter Into A Cone Shape
Rolling your batter into a perfect cone shape can be tricky, but with a little patience and finesse, you’ll soon be enjoying the sweet reward of your hard work.
To begin, place your freshly cooked waffle on a flat surface. While still warm, use a spatula to gently lift one edge of the waffle and begin rolling it up tightly towards the opposite edge.
As you roll, remember that you have some flexibility when shaping your cone.
Adjust your rolling technique if you prefer an alternative shape, like a cylinder or pyramid.
Once you’ve achieved the desired shape, hold the cone firmly for a few seconds until it cools and holds its form.
You’re now ready to move on to decorating options!
But first, let’s learn how to cook your waffle cones perfectly.
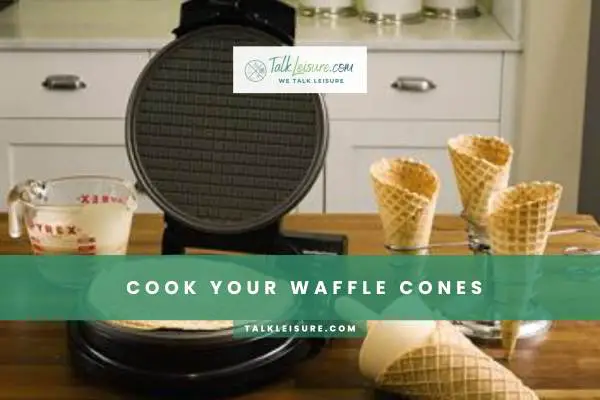
Cook Your Waffle Cones – Make Waffle Cone With Pancake Batter On A Waffle Iron
Timing is crucial when cooking waffle cones, so watch the clock. Once the cone maker indicates they’re ready, use a pair of tongs to carefully remove the hot and crispy waffle cones from the machine.
Timing The Cooking Process
As if waiting for a waffle cone to cook wasn’t already agonizing enough, now we have to time it perfectly with the precision of an Olympic athlete.
But fear not; there are tips for perfect timing that will help you avoid burnt waffle cones.
First, always keep an eye on the color of your waffle cones as they cook. It’s time to remove them from the maker when they turn a light golden brown.
Another important tip is only to make one or two waffle cones at a time.
Cooking too many at once can lead to uneven heat distribution and result in some cones being overcooked while others remain undercooked.
Lastly, don’t be afraid to experiment with different cooking times and temperatures until you find what works best.
With these tips, you can make perfectly cooked waffle cones every time!
Now that you know how long to cook your waffle cones, remove them from the maker without ruining their shape or texture.
Removing The Waffle Cones From The Maker
Ready to savor your freshly cooked waffle cones?
Here’s how to remove them from the maker without any mishaps.
First, ensure you have a pair of heat-resistant gloves or tongs to handle the hot cones safely.
Gently lift the waffle cone maker’s top plate and carefully grasp the cone’s edge with your gloves or tongs. Slowly and steadily pull it out while applying slight pressure to release it from the plates.
Repeat this process for all remaining cones.
If you’re having trouble removing your waffle cones, don’t panic!
Sometimes, excess batter can cause them to stick to the plates.
To avoid this issue, lightly grease the plates with cooking spray before adding batter.
If that doesn’t work, use a plastic spatula or fork to gently loosen the edges of each cone before attempting to remove them again.
With these tips for easy removal, you’ll be able to enjoy your homemade waffle cones in no time!
Now that you’ve successfully removed your waffle cones from the maker, it’s time to shape them into bowls for ice cream or other treats!
Shape Your Waffle Bowls
Shape Your Waffle Bowls
You can easily form your bowls by pressing the hot pancake batter onto an upside-down muffin tin, resulting in a crispy container that will make your dessert experience unforgettable.
This technique is especially handy if you don’t have a waffle cone maker or want to try out some waffle bowl alternatives.
Once the pancake mix has cooked on each side for 2-3 minutes, remove it from the heat and place it over the bottom of a muffin tin cup.
While still warm, use your fingers to gently shape the batter around the cup, creating a bowl-like structure.
Decorating waffle bowls is also an opportunity to get creative with your desserts. A medium bowl will be perfect for all ice cream lovers.
You can drizzle chocolate syrup inside or sprinkle powdered sugar on top for extra sweetness. For something more adventurous, try filling your waffle bowl with fruit salad, yogurt, and granola for breakfast.
The possibilities are endless!
Now that you’ve learned how to shape your waffle bowls and cool completely, add your toppings and enjoy this delicious treat.
Add Your Toppings – Make It A Homemade Ice Cream Cone
Add Your Toppings
It’s time to pile on your favorite toppings and indulge in the ultimate dessert experience inside your crispy, homemade waffle bowls.
The possibilities are endless regarding ice cream flavors and decorating tips. You can choose classic vanilla or chocolate ice cream or mix it with unique flavors like mint chip or strawberry cheesecake.
As for toppings, you can go for a simple sprinkle of rainbow sprinkles or get creative with hot fudge drizzles, chopped nuts, and fresh fruit.
Add some flair to your decorations to take your waffle cone game to the next level.
Use a piping bag filled with melted chocolate to create intricate designs inside your waffle bowls before adding the ice cream.
Or try rolling the edges of your cones in crushed cookies or candy pieces for an extra crunch.
Whatever you choose, savor every bite of this delicious treat!
Now that you’ve added all your desired toppings and decorations, filling those beautiful waffle cones with creamy ice cream goodness scoops is time.
Fill Your Waffle Cones -Why You Need A Waffle Cone With The Best Ice Cream Recipes
Get ready to experience the ultimate ice cream indulgence as you fill your crispy, homemade waffle bowls with an absurdly delicious amount of creamy goodness.
But before you start filling your cones, think outside the box and consider some creative cone fillings that will take your dessert game to the next level.
Here are a few ideas for discussion:
Make a s’mores waffle cone with marshmallows, chocolate chips, and graham cracker crumbs.
For a sweet and salty combo, try filling your cone with caramel popcorn and drizzling it with chocolate sauce.
If you’re feeling adventurous, go for a savory waffle cone with scrambled eggs, bacon bits, and shredded cheddar cheese.
Fruit lovers can fill their cones with fresh sliced strawberries or blueberries and top them off with whipped cream.
Nutella fans can’t go wrong by simply spreading Nutella inside their waffle cone and topping it off with chopped hazelnuts.
Now that you’ve got some tasty ideas on how to fill your waffle cones let’s move on to the final step: enjoying your homemade creation!
Enjoy Your Homemade Waffle Cones!
Enjoy Your Homemade Waffle Cones!
Now’s the time to savor the fruits of your labor and relish in the delectable flavors of your homemade waffle cone creations! You’ve worked hard to make these treats, so it’s important to enjoy them fully.
Here are some tips for serving waffle cones at parties: set up a toppings bar with sprinkles, chocolate chips, fresh fruit, whipped cream, and other goodies so guests can customize their cones.
You can also try filling your waffle cones with unique ingredients like Nutella, peanut butter cups, or even ice cream sundae toppings for an extra special treat.
When it comes to enjoying your homemade waffle cones solo, there are endless possibilities for fillings.
Try stuffing them with fresh berries and whipped cream for a light summer dessert, or go all out with cookie dough chunks and hot fudge sauce for a decadent indulgence.
The beauty of making your waffle cones is that you have complete control over what goes inside them – so get creative and experiment with different flavor combinations until you find your perfect match!
Conclusion
Congratulations! You’ve successfully made delicious homemade waffle cones using pancake mix.
Now it’s time to enjoy your creation’s sweet, crispy goodness.
As you take your first bite, you can’t help but feel a wave of nostalgia wash over you.
You’re transported back to childhood summers at the local ice cream shop.
But it’s even better this time because your kitchen made these waffle cones with love and care.
So indulge in that scoop of ice cream or pile on your favorite toppings.
You deserve it after all that hard work! And who knows, maybe you’ll try making waffle bowls or experimenting with different flavors next time.
The possibilities are endless for homemade treats like these anachronistic delights!
Frequently Asked Questions
Can I Use Regular Flour Instead Of Pancake Mix To Make Waffle Cones?
You’re in luck! You can still make delicious waffle cones by using regular flour as a substitution if you don’t have pancake mix on hand.
While it may not produce the same texture and flavor, it will still yield a crispy cone for holding your favorite ice cream flavors.
Just be sure to follow the recipe closely and use high-quality ingredients. Even with pancake mix, not all brands are created equal. Some of the best pancake mix brands include Bisquick, Krusteaz, and Aunt Jemima.
How Long Should I Let The Waffle Cone Maker Preheat Before Using?
Before making waffle cones with pancake mix, it’s important to know how long to let the waffle cone maker preheat for optimal results. Generally, preheating the machine for about 5 minutes before use is recommended.
Ensure the temperature reaches around 375°F before adding the batter for a crispy, evenly cooked cone. Additionally, shaping the cone can be tricky, but you’ll get the hang of it with some practice.
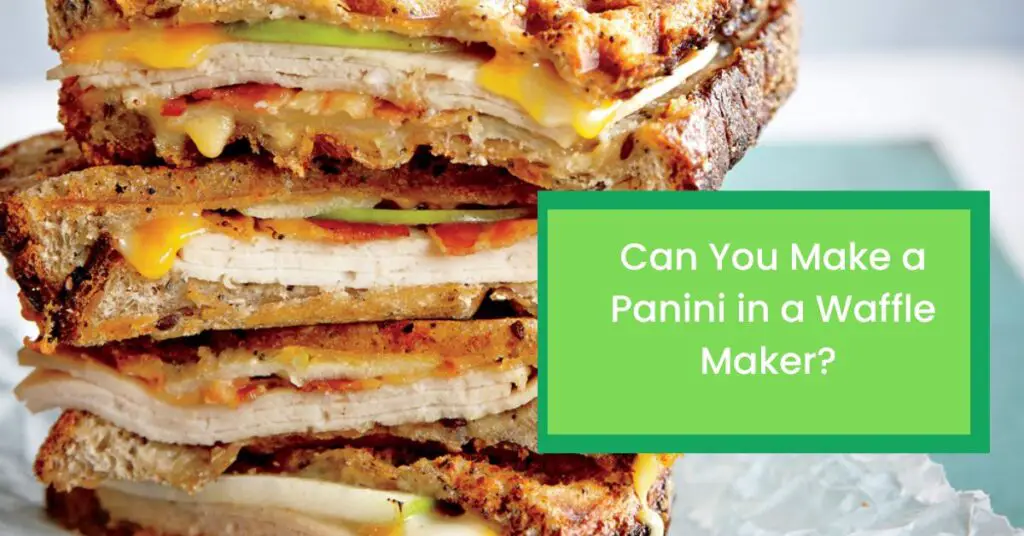
Can I Make Waffle Cones Without A Waffle Cone Maker?
One option is using a stove-top method with a non-stick pan or griddle.
Simply pour the batter onto the hot surface and use a spatula to shape it into cone form as it cooks.
Another creative alternative is dipping pre-made sugar or wafer cones in melted chocolate before filling it with your favorite ice cream flavors.
How Do I Store Leftover Waffle Cones?
Store the waffle cones in an airtight container or bag at room temperature to keep them fresh and crispy.
If you live in a humid area, consider adding a small packet of silica gel to the container to absorb moisture.
When you’re ready to enjoy another cone, gently reheat it in the oven or microwave for a few seconds before filling it with your favorite ice cream flavors.
Can I Make Savory Waffle Cones Instead Of Sweet Ones?
If you want a unique twist on the classic waffle cone, can you create savory waffle cones instead of sweet ones’
These cones can be filled with various delicious and unexpected fillings, from pulled pork to guacamole. The key is experimenting with different flavors and textures until you find the perfect combination.
Some popular options include using cheese or herbs in the batter or filling the cone with spicy chicken, roasted vegetables, or even hummus.
Recipe For Waffle Cones - New Best Homemade Waffle… Imagine the smell of freshly baked waffle cones wafting through your kitchen as you eagerly await the first bite of your homemade creation. Waffle cones…
How To Make Waffle Cones Without A Waffle Iron? Did you know that the average American consumes approximately 23 pounds of ice cream annually? And while store-bought waffle cones may be convenient, making your…
Is A Chaffle Maker The Same As A Waffle Maker? -… Are you curious about the difference between chaffle and waffle makers? While both appliances can produce delicious breakfast treats, they are not interchangeable. A chaffle…